
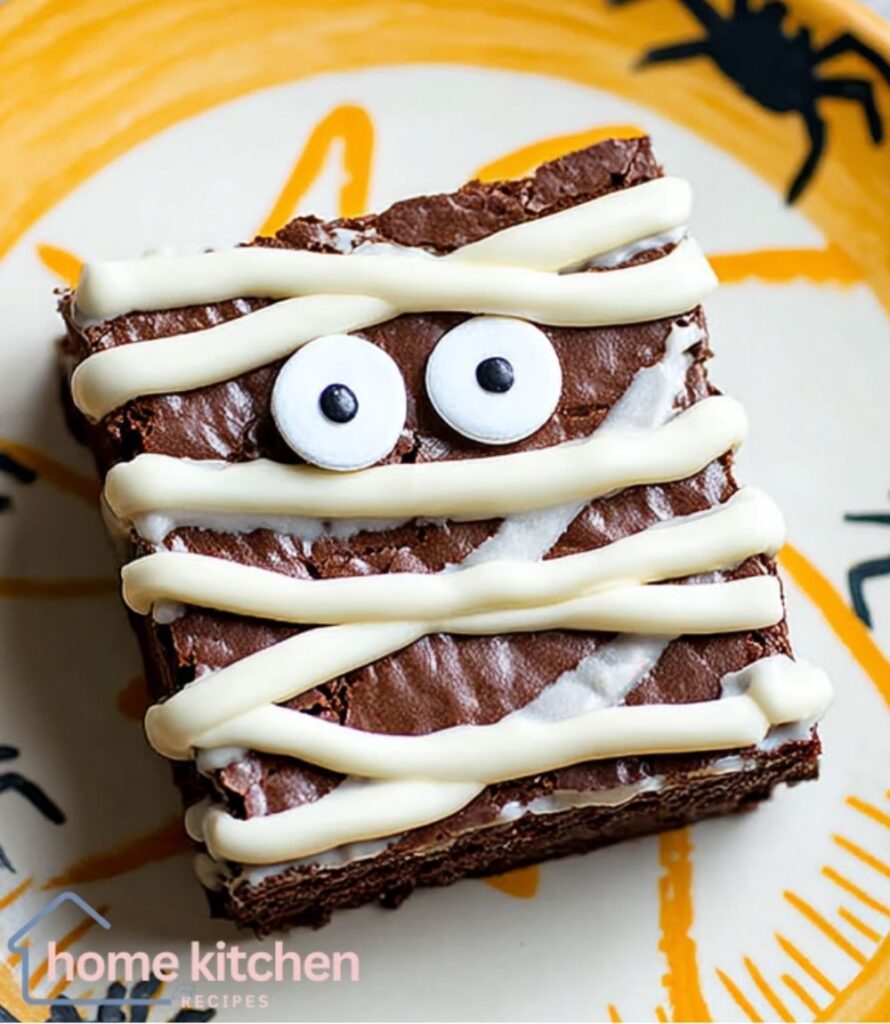
Dive into the Halloween spirit with our Gluten-Free Halloween Mummy Brownies Recipe! These delightful treats are not only spooky and fun, but they’re also incredibly easy to make. Perfect for family gatherings or a festive party, these brownies will be a hit with kids and adults alike. The combination of rich, chocolatey goodness and whimsical mummy decorations makes these brownies irresistible. Plus, they’re gluten-free, so everyone can enjoy them without worry. Gather around the kitchen with your loved ones and create a batch of these sweet, spooky delights to celebrate the season!
Why You’ll Love This Recipe
- Simple and quick to prepare with a boxed mix.
- Fun and festive for Halloween celebrations.
- Customizable to accommodate dietary needs.
- Rich chocolate flavor with a whimsical twist.
Ingredients
For the brownies:
- 1 box gluten-free brownie mix (or homemade GF brownie recipe)
- Ingredients required for the mix (usually eggs, oil, and water)
For the mummy decoration:
- 1 cup white chocolate chips (use dairy-free if needed)
- 1 teaspoon coconut oil (optional, for smoother melting)
- Candy eyes (gluten-free/vegan-friendly)
Instructions
- Preheat oven according to brownie mix instructions. Line a baking pan with parchment paper.
- Prepare brownie batter as directed on the box or recipe.
- Pour batter into the prepared pan and bake as instructed until set.
- Let brownies cool completely before cutting them into rectangles or squares.
- Melt white chocolate chips with coconut oil until smooth.
- Transfer melted chocolate into a piping bag or zip bag with a small tip cut off.
- Drizzle back and forth over brownies to create mummy “bandages.”
- Place 2 candy eyes on each brownie while chocolate is still soft.
- Let set at room temperature or refrigerate until decorations are firm.

You Must Know
- Ensure your candy eyes are gluten-free and vegan if needed.
- Use parchment paper to prevent sticking and ensure easy removal.
- Cool brownies completely before decorating for best results.
Storage Tips
Store leftover brownies in an airtight container at room temperature for up to three days. For longer storage, refrigerate them for up to a week. If you need to keep them even longer, freeze them in a sealed container for up to three months.
Ingredient Substitutions
If you need a dairy-free option, choose dairy-free white chocolate chips, and skip the coconut oil if it’s unavailable. You can also use homemade gluten-free brownie recipes if you prefer not to use a boxed mix. For an extra flavor twist, consider adding a teaspoon of vanilla or almond extract to the brownie batter.
Serving Suggestions
Serve these mummy brownies at your Halloween party or pack them in lunchboxes for a spooky surprise. Pair them with a glass of cold almond milk or your favorite dairy-free beverage for a satisfying treat.
Cultural Inspiration
Halloween, a holiday celebrated on October 31st, is known for its playful and spooky themes. Originating from the ancient Celtic festival of Samhain, where people would light bonfires and wear costumes to ward off ghosts, Halloween has evolved into a community-centered holiday with child-friendly activities like trick-or-treating and themed parties. These mummy brownies capture the playful spirit of Halloween while being mindful of dietary restrictions.
Pro Tips
- Use a double boiler to melt the white chocolate chips evenly without scorching.
- For an extra spooky touch, use edible gel in red or black to add more detail to the mummies.
- If you don’t have a piping bag, a small sandwich bag with a corner snipped off works perfectly for drizzling.
Gluten-free Halloween Mummy Brownies Recipe
10 minutes
30 minutes
40 minutes
Ingredients
Instructions
Preheat oven according to brownie mix instructions. Line a baking pan with parchment paper.
Prepare brownie batter as directed on the box or recipe.
Pour batter into the prepared pan and bake as instructed until set.
Let brownies cool completely before cutting them into rectangles or squares.
Melt white chocolate chips with coconut oil until smooth.
Transfer melted chocolate into a piping bag or zip bag with a small tip cut off.
Drizzle back and forth over brownies to create mummy “bandages.”
Place 2 candy eyes on each brownie while chocolate is still soft.
Let set at room temperature or refrigerate until decorations are firm.
Notes
- Ensure your candy eyes are gluten-free and vegan if needed.
- Use parchment paper to prevent sticking and ensure easy removal.
- Cool brownies completely before decorating for best results.
Frequently Asked Questions
Can I make these brownies ahead of time?
Yes, you can bake the brownies a day or two in advance and store them in an airtight container. Add the decorations on the day of serving for the best appearance.
Are these brownies vegan?
They can be made vegan by using a vegan brownie mix and ensuring that both the white chocolate chips and candy eyes are vegan-friendly.
What if I don’t have candy eyes?
You can use small chocolate chips or dots of black icing as an alternative for the eyes.
Can I use regular brownie mix for this recipe?
Absolutely! If gluten-free is not a requirement, feel free to use your favorite regular brownie mix for this recipe.